
Mosquitto (MQTT broker) Demo
MQTT stands for Message Queuing Telemetry Transport which is an ISO standard (ISO/IEC PRF 20922) publish-subscribe-based "lightweight" messaging protocol for use on top of the TCP/IP protocol. It is designed for connections to remote locations where a "small code footprint" is required or the network bandwidth is limited. The publish-subscribe messaging pattern requires a message broker. The broker is responsible for distributing messages to interested clients based on the topic of a message. Andy Stanford-Clark and Arlen Nipper of Cirrus Link Solutions authored the first version of the protocol in 1999 [1].
In this demo, I work on Mosquitto platform (An Open source MQTT v3.1/v3.1.1 Broker)
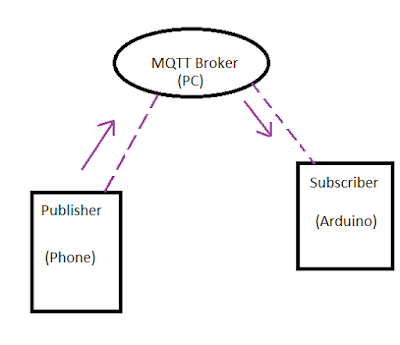
The picture shows the basic MQTT protocol. MQTT broker - Mosquitto is installed into a Gateway - Kura based (Hardware: Raspberry Pi 2; OS: Raspbian). The clients - Publisher/Subscriber connect to MQTT broker via WiFi which is established by the PC. The Subscriber is an Arduino board with WiFi module that subscribes a Topic (for example "Node01") to receive a message. The Publisher is a smartphone running MQTT client software that will publish a message to a topic (for example "Node01").
Requirements
- Hardwares: Raspberry Pi 2 (WiFi dongle); Arduino with WiFi module (Adafruit Huzzah Esp8266); Smartphone (Android, IOS)
* Step 1: Setup Kura into Raspberry Pi
The picture shows the Gateway hardware which consists of Raspberry Pi and WiFi dongle.

Follow this link for installing Kura into Raspberry Pi: http://eclipse.github.io/kura/doc/raspberry-pi-quick-start.html
We setup the Raspbery Pi in the Access Point mode for providing WiFi connection:

* Step 2: Install Mosquitto broker on Raspberry Pi
We use Mosquitto platform as a MQTT broker running on Rapsberry Pi. It provides MQTT protocol for our sensor network system. For more information about MQTT protocol; please visit this page: what is MQTT and how does it work
To install Mosquitto, follow these steps:
wget http://repo.mosquitto.org/debian/mosquitto-repo.gpg.key
sudo apt-key add mosquitto-repo.gpg.key
Then make the repository available to apt:
cd /etc/apt/sources.list.d/
Then one of the following, depending on which version of debian you are using:
sudo wget http://repo.mosquitto.org/debian/mosquitto-jessie.list
Then update apt information:
sudo apt-get update
And discover what mosquitto packages are available:
apt-cache search mosquitto
Or just install mosquitto broker and clients tool:
sudo apt-get install mosquitto mosquitto-clients python-mosquitto
Stop the Server
sudo /etc/init.d/mosquitto stop
Configuring and Starting the Mosquitto Server
sudo nano /etc/mosquitto/mosquitto.conf
The File Should Look as follows
# Place your local configuration in /etc/mosquitto/conf.d/
#
# A full description of the configuration file is at
# /usr/share/doc/mosquitto/examples/mosquitto.conf.example

pid_file /var/run/mosquitto.pid

persistence true
persistence_location /var/lib/mosquitto/

log_dest topic

log_type error
log_type warning
log_type notice
log_type information

connection_messages true
log_timestamp true

include_dir /etc/mosquitto/conf.d
Starting the Server
sudo /etc/init.d/mosquitto start
For more information, please follow this link: http://mosquitto.org/2013/01/mosquitto-debian-repository/
* Test mosquitto broker
Open up two more terminal windows.
In Terminal window (subscriber) 1 type:
mosquitto_sub -d -t hello/world
In Terminal window 2 (publisher) type:
mosquitto_pub -d -t hello/world -m "Hello from Terminal window 2!"
Result:
* Step 3: Install MQTT demo code for Arduino
The Huzzah esp8266 board will receive the message from the phone in order to control a LED (connected to pin #0). The LED will be turned off if Huzzah receives message "a" and turn on with others messages.

There are many MQTT libraries for Arduino platform. For this demo, I use MQTT library created by Joel Gahwiler (available in Github)
It is installed into Ardafruit Huzzah Esp8266 board.
In the sketch, we need to define these parameters:
"firstly, we need to connect Arduino Huzzah to the Gateway via WiFi connection which is established by the Gateway"
ssid = "YOUR_WIFI_NAME" //WiFi connection established from the Gateway
pass = "YOUR_WIFI_PASSWORD"
Then replace "broker.shiftr.io" by 172.16.1.1 for MQTT broker
Finally, define subscribe topic client.subscribe("node01"); for receiving message payload from the publisher.
Full code here:
#include <ESP8266WiFi.h>

#include <MQTTClient.h>

const char *ssid = "agrinode";

const char *pass = "12345678";

WiFiClient net;

MQTTClient client;

unsigned long lastMillis = 0;

void connect(); // <- predefine connect() for setup()

void setup() {

  Serial.begin(9600);

  WiFi.begin(ssid, pass);

  client.begin("172.16.1.1", net);

  pinMode(0,OUTPUT);

  connect();

}

void connect() {

 ` Serial.print("checking wifi...");

` while (WiFi.status() != WL_CONNECTED) {`

 `   Serial.print(".");`

  `  delay(1000);`

 ` }`

 ` Serial.print("\nconnecting...");`

  `while (!client.connect("arduino", "try", "try")) {`

  `  Serial.print(".");`

   ` delay(1000);`

 ` }`

  `Serial.println("\nconnected!");`

 ` client.subscribe("node01");`

  `// client.unsubscribe("/example");`

}

void loop() {

  client.loop();

  delay(10); // <- fixes some issues with WiFi stability

  if(!client.connected()) {

    connect();

  }

  // publish a message roughly every second.

  if(millis() - lastMillis > 1000) {

   lastMillis = millis();

    client.publish("/hello", "world");

  }

}

void messageReceived(String topic, String payload, char * bytes, unsigned int length) {

  Serial.print("incoming: ");

  Serial.print(topic);

  Serial.print(" - ");

  Serial.print(payload);

  Serial.println();

  if (payload=="a"){digitalWrite(0,HIGH);}

  else digitalWrite(0,LOW);

}
* Step 4: Install MQTT client software for Android phone
There are many softwares available for MQTT protocol testing. I use MyMQTT for my Android phone.
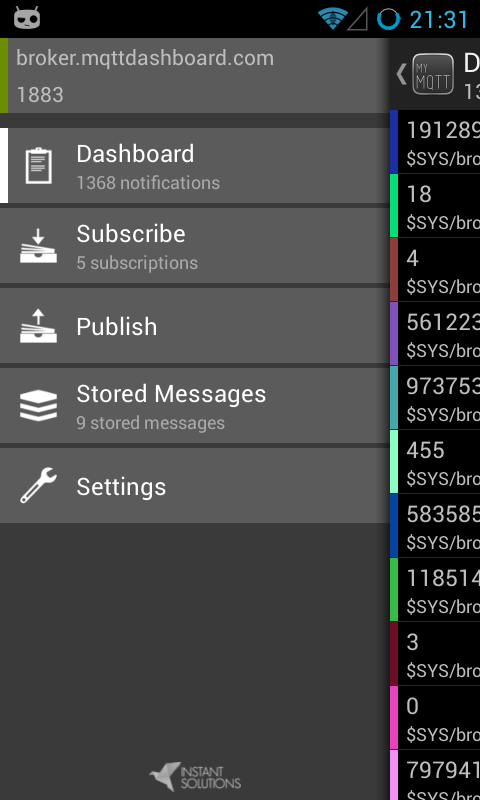
For "Setting": we need MQTT broker host (it is the Gateway IP: 172.16.1.1:1883) and "Topic" for publishing message (it is: Node01).
For publishing a message: navigate to "Publish" button -> then fill in the Topic (Node01) and message.