Installing Windows 10 IoT Core for Raspberry Pi
In this post I will be going to process of how to install Windows 10 IoT core for Raspberry Pi 2. For more information about Windows IoT Core, please visit the official site https://developer.microsoft.com/en-us/windows/iot/docs. Windows IoT core is the operating system built for Internet of Things.
Requirement:
- Windows 10 PC
- SD Card
- Raspberry Pi 2
Get started
1. Download OS for Raspberry Pi
Firstly, we need to download Windows 10 IoT core package for Raspberry Pi 2 on the official website: https://developer.microsoft.com/en-us/windows/iot/Downloads After downloading the package, we then Install Windows IoT Core For Raspberry Pi on your PC. Double-click on the file downloaded and install Windows 10 IoT Core for Raspberry Pi.

After installing, the flash file will be saved in your C drive (C:\Program Files (x86)\Microsoft IoT\FFU\RaspberryPi2\flash.ffu)
2. Download and install Windows ADK
https://developer.microsoft.com/en-us/windows/hardware/windows-assessment-deployment-kit Pleck check on “Imaging and Configuration Designer (ICD)” To create and apply FFU images for Windows 10, Version 1607 and earlier, you can use Windows Imaging and Configuration Designer (ICD) which is included in the Windows Assessment and Deployment Kit (ADK) for Windows 10, Version 1607. You can use the Windows 10 version of DISM, which is included in the Windows 10 version of Windows Preinstallation Environment (WinPE)to apply FFU images
Apply the image to a drive. For a physical drive X:, the string should be the following form: \\.\PhysicalDriveX, where X is the disk number that diskpart provides, such as \\.\PhysicalDrive1. Hard disk numbers start at zero. For more information about PhysicalDriveX, see CreateFile function.
To check PhycicalDriverX, open CMD
diskpart
list disk
exit
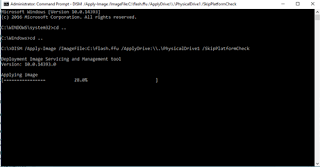
At this point. Copy flash.ffu file to C:/ Then execute the command:
DISM /Apply-Image /ImageFile:C:\flash.ffu /ApplyDrive:\\.\PhysicalDrive1 /SkipPlatformCheck
For more information about /SkipPlatformCheck, see Apply-Image in DISM image management command-line options

Now the Windows IoT is ready to use. Remove the SD card from PC and plug it into Raspberry Pi 2. Connect internet cable and power the board. Raspberry Pi will boot into Windows 10 IoT OS.